This week, I have been sharing with you how I organise my Command Central Station in my home. This area is just vital to us staying organised with paperwork, plus it provides some much needed solutions to the clutter that would otherwise accumulate on the kitchen bench!
My Weekly 'To Do' Folder is another part of this station that I couldn't live without, so today I will unpack how I have set it up, and how it helps me to stay on track with my weekly jobs.
Showing posts with label Stationery. Show all posts
Tuesday, 23 April 2013
Monday, 22 April 2013
File Folders in my Command Central Station
Yesterday, I posted about my Command Central Station here.
Today, I want to elaborate on how I organise the file folders that hold the incoming paperwork that flows into our house! I do admit that this is a long post, but I wanted to put all of this information in one location for you :)
Labels:
Organising,
Stationery
Sunday, 21 April 2013
My Command Central Station
Today I thought I would share how I organise our incoming/outgoing paperwork and general 'bits and pieces' in our living area. This system has changed over the years, and since I have not been working and spending less and less time in the study for anything other than 'creative' work, having this all in the living area just makes sense for us.
Labels:
Organising,
Stationery
Sunday, 17 February 2013
Cath Kidston Sticker Book
Today I thought I would share this gorgeous little sticker book that I was given for Christmas. It is the Cath Kidston 'Book of Stickers'. It is jam-packed with stickers for all sorts of occasions...
Labels:
Cassadiva's Choice,
Stationery
Monday, 31 December 2012
Balloon Pocket - A Fun Addition to a Birthday Card in the Mail
I love to send good old-fashioned mail. Especially birthday cards! Today I thought that I would share with you a little something that I added in with the birthday cards that I posted last year.
Labels:
Craft,
Presents,
Stationery
Sunday, 30 December 2012
Organising Cards & Presents for the Year Ahead - 2013
Yesterday I reviewed my presents list for the new year. I keep a Spreadsheet detailing all of the presents for the year, and this is how I allocate a fortnightly allocation out of our pay that gets automatically transferred into my Presents Account. The past two Christmas' I have come out with money left in the account (yay!), so this indicates to me that this system works, needless to say that we will be continuing with this system again in 2013.
Labels:
Organising,
Presents,
Stationery
Wednesday, 5 September 2012
Erasable Highlighters and Felt Pens
Last year I wrote about my favourite pens - the Frixion eraseable pens, which you can read about here. I just love these pens - they come in a range of colours, and the best part is that they rub out! You loved them too - I got so much great feedback about the pens from people who hadn't heard of them before!
I noticed a little while back that there have been some new additions to the Frixion family, so I thought I should share them with you!
Firstly, there are a erasable felt-tip pens!
I noticed a little while back that there have been some new additions to the Frixion family, so I thought I should share them with you!
Firstly, there are a erasable felt-tip pens!
Labels:
Stationery
Friday, 17 August 2012
Planner Pages Organisation
I feel like I haven't been making much progress with my study makeover, so this week I decided to do a couple of little projects that have helped me feel like I am getting somewhere... Today I will share how I store my used planner pages, prior to archiving them.
I found this gorgous napkin stand at Ikea recently, and knew that I just had to have it. What for? I did not know, but I bought it anyway. I thought it was just perfect for vertical paper storage (my newest organising passion), so I brought it home and stood it on my desk empty for a few weeks. At only $3.99 I think it was a bargain, and I knew I would find a use for it sooner or later!
Labels:
My Study,
Organising,
Stationery
Friday, 3 August 2012
Organising Sprapbooking Paper and Photo Pockets
My next instalment of my series on my 'in progress' Creative Studio is my storage solution for scrapbooking paper, cardstock and plastic photo pocket pages.
Over the past tweleve months, I have decided that vertical paper storage really works for me. Last year I organised my Recipes using a suspension file system, and I haven't looked back! At work, I have my Black and White folders on a vertical stand, which has helped me to avoid a piled high in-tray.
Labels:
My Study,
Organising,
Project Life,
Scrapbooking,
Stationery
Friday, 22 June 2012
My Wrapping Station
I started to make-over my home office a few months back. I showed you the before pictures quite a while ago, but progress has been slow, due to my indecisiveness, so I don't have much to report back sorry! I am currently doing an online course with the amazing Aby Garvey from Simplify 101, called Organise your Creative Workspace. I am now slowly unpacking my creative process and my style, in order to design the perfect home office/creative studio for me! So, it is going to be a little while before you see any 'after' pictures!
A little side project however, has been my wrapping station. I had found my inspiration and pinned it to my Pinterest board, and hunted local shops for the bits and pieces that I needed to make it a reality. One might say I am 'wrapped' with the outcome! Let's take a closer look...
Labels:
My Study,
Organising,
Presents,
Sewing,
Stationery
Sunday, 15 April 2012
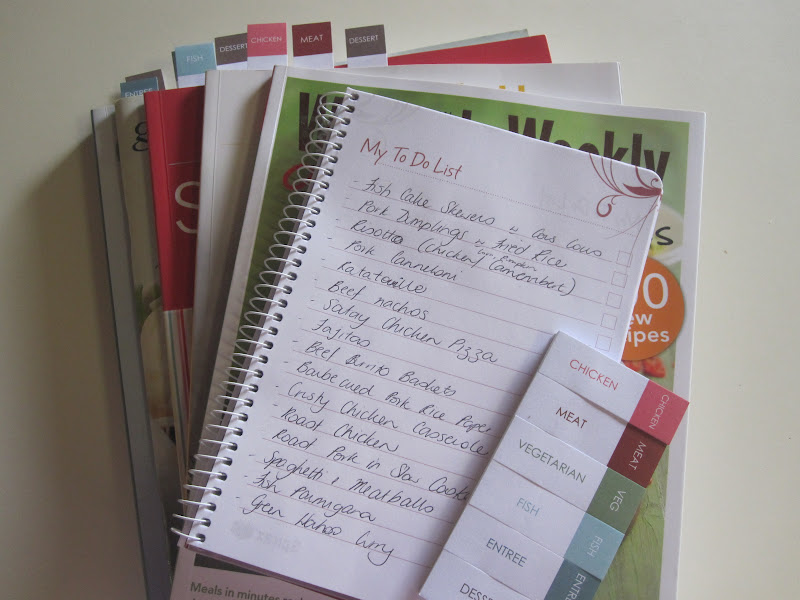
Meal Planning Inspiration
I was feeling like I was in a bit of rut with my meal planning recently. I felt like we were having the same meals over and over, and I don't know about you, but I get tired of cooking the same foods...
Last night I decided to search for some insiration the old fashioned way - not online, but with some recipe books! I picked out half a dozen books from my collection and sat down for about an hour of browsing pleasure!
Labels:
Cafe Cassadiva,
Organising,
Recipes,
Shopping,
Stationery
Sunday, 15 January 2012
Stationery - Black & White Office Accessories
I just had to share this beautiful stationery range that I found at Big W over the weekend! The desk accessories come in black or white leatherette, and the folders have these amazing black and white patterns on them!
I have been looking around for a while for a new 'look' for my work office. I thought I needed a change from good old pink! Gasp! Don't worry - I still have a pink diary and pencil case, just to keep things cheery and bright ;)
So, here is the range (or rather the bits that I bought) that are going to keep me super organised this year at work:
I have been looking around for a while for a new 'look' for my work office. I thought I needed a change from good old pink! Gasp! Don't worry - I still have a pink diary and pencil case, just to keep things cheery and bright ;)
So, here is the range (or rather the bits that I bought) that are going to keep me super organised this year at work:
Labels:
Organising,
Stationery
Sunday, 14 August 2011
Organising Greeting Cards
A greeting card is a quicky, easy and inexpensive way to let someone special know that you are thinking of them.
I have always loved writing cards and letters to people... I remember writing letters to my cousins when we were growing up - there was nothing more exciting than the thrill of the postman delivering a reply! And when my dear Granny passed away, we came across a big box of letters that I sent to her over the years. And in high school, my girlfriends and I would write letters, pages long, every night to each other.
Since email and texting have come along, it has changed the way that people communicate. Yes, I do rely on email and texts to send messages to loved ones, but I still have big place in my heart for the good old fashioned card or letter posted in the mail!
I try to post birthday cards to my friends and family for their special day, and letters of thanks and well-wishes when I deem it timely. Monday night is my 'Cards and Presents' planning night, so it is on this day each week that I check the calendar and write any cards that I need to post in the coming week. I also look back on the week just passed, and write any thank-you cards to friends who hosted an event that I attended. I also check my phone for recent messages, and send cards to people who might need some cheering up because they are unwell or have had some bad news.
Keeping up with cards requires an element of organisation. Without cards and stamps on hand, the thought of sending someone a card won't actually eventuate and I do admit to missing special occasions altogether because I just wasn't prepared.
So here is how I stay on top of it... I buy greeting cards in bulk. When there is a book stand in the middle of the shopping centres, they often have boxes of hand-made greeting cards to buy. When you can pick up a box of 30 beautifully embelished cards for $25 - you are onto a good thing! It costs less than $1 a card, and the person on the receiving end will value it as priceless :)
The boxes usually come with a variety of cards for events such as birthdays, anniversaries, babies, get well, etc. The boxes are usually really sturdy and with a bit of scrapbooking paper, you can re-purpose it into a box for something else in your home! I also buy boxes of blank cards from stationery shops too. You should try checking out the throw-out table at the newsagency next time you are there!
I keep all of my greeting cards in this box (gotta love Ikea!).
I have divided the box using A4 divider tabs, which I cut to size for this box, so that my cards are organised and easy to access.
I have a tab for each month, so that I can plan ahead of time.
And tabs for different events such as birthdays, weddings, babies, etc.
Usually 2 weeks before the end of the month, I take my calendar (which you can read more about here) and my card box and put aside any cards that I will need for the upcoming month's birthdays, anniversaries, parties, etc. If I don't have the right card for an occasion, I write it on my shopping list and I have at least 2 weeks to find it.
I always make sure that I have plenty of postage stamps and address labels in my Postage Box, so that I can address and stamp it immediately, and all I need to do is pop it in the post box.
I also have these 2 great books, which help with card-writing. I like to take time to write something thoughtful in cards, and books like this provide ideas and inspiration which you can personalise to the event you are celebrating. A heartfelt message speaks volumes :)
Hopefully that gives you some ideas on how to organise your greeting cards. I think I am pretty good at sending birthday and thank-you cards, but next year my goal is going to be anniversaries! I have a really big extended family on my Mum's side - so next year I want to make sure that I get birthday cards out to all of my cousins' kids too... At last count there was 30+!!
I have always loved writing cards and letters to people... I remember writing letters to my cousins when we were growing up - there was nothing more exciting than the thrill of the postman delivering a reply! And when my dear Granny passed away, we came across a big box of letters that I sent to her over the years. And in high school, my girlfriends and I would write letters, pages long, every night to each other.
Since email and texting have come along, it has changed the way that people communicate. Yes, I do rely on email and texts to send messages to loved ones, but I still have big place in my heart for the good old fashioned card or letter posted in the mail!
I try to post birthday cards to my friends and family for their special day, and letters of thanks and well-wishes when I deem it timely. Monday night is my 'Cards and Presents' planning night, so it is on this day each week that I check the calendar and write any cards that I need to post in the coming week. I also look back on the week just passed, and write any thank-you cards to friends who hosted an event that I attended. I also check my phone for recent messages, and send cards to people who might need some cheering up because they are unwell or have had some bad news.
Keeping up with cards requires an element of organisation. Without cards and stamps on hand, the thought of sending someone a card won't actually eventuate and I do admit to missing special occasions altogether because I just wasn't prepared.
So here is how I stay on top of it... I buy greeting cards in bulk. When there is a book stand in the middle of the shopping centres, they often have boxes of hand-made greeting cards to buy. When you can pick up a box of 30 beautifully embelished cards for $25 - you are onto a good thing! It costs less than $1 a card, and the person on the receiving end will value it as priceless :)
The boxes usually come with a variety of cards for events such as birthdays, anniversaries, babies, get well, etc. The boxes are usually really sturdy and with a bit of scrapbooking paper, you can re-purpose it into a box for something else in your home! I also buy boxes of blank cards from stationery shops too. You should try checking out the throw-out table at the newsagency next time you are there!
I keep all of my greeting cards in this box (gotta love Ikea!).
I have divided the box using A4 divider tabs, which I cut to size for this box, so that my cards are organised and easy to access.
I have a tab for each month, so that I can plan ahead of time.
And tabs for different events such as birthdays, weddings, babies, etc.
Usually 2 weeks before the end of the month, I take my calendar (which you can read more about here) and my card box and put aside any cards that I will need for the upcoming month's birthdays, anniversaries, parties, etc. If I don't have the right card for an occasion, I write it on my shopping list and I have at least 2 weeks to find it.
I always make sure that I have plenty of postage stamps and address labels in my Postage Box, so that I can address and stamp it immediately, and all I need to do is pop it in the post box.
I also have these 2 great books, which help with card-writing. I like to take time to write something thoughtful in cards, and books like this provide ideas and inspiration which you can personalise to the event you are celebrating. A heartfelt message speaks volumes :)
Hopefully that gives you some ideas on how to organise your greeting cards. I think I am pretty good at sending birthday and thank-you cards, but next year my goal is going to be anniversaries! I have a really big extended family on my Mum's side - so next year I want to make sure that I get birthday cards out to all of my cousins' kids too... At last count there was 30+!!
Labels:
Organising,
Stationery
Saturday, 13 August 2011
Clip-Tabs: A Paper Clip crossed with a Sticky Note
I received some Clip-Tabs as a gift last year, and since then I have been so impressed with both their functionality and their cute appearance.
Basically, they are a paper clip that sits inside a small tab made of coloured cardstock. They serve the purpose of holding together multiple sheets of paper, as well as have a tab that can stick out the top/side, and be labelled for easy identification in the future.
I have these gorgeous tabs in both pink and purple shades, and they just add a dimension of 'prettiness' to everything that they are used for!
Basically, they are a paper clip that sits inside a small tab made of coloured cardstock. They serve the purpose of holding together multiple sheets of paper, as well as have a tab that can stick out the top/side, and be labelled for easy identification in the future.
I have these gorgeous tabs in both pink and purple shades, and they just add a dimension of 'prettiness' to everything that they are used for!
Labels:
Organising,
Stationery
Tuesday, 19 July 2011
Hanging Suspension Files with Snap Lock Tabs
I found these amazing hanging files in Officeworks, when I was on the hunt for red files for my recent Recipes project (you can read about it here). I certainly never expected to find this amazing product!
It wasn't until I got home that I realised the amazing feature that this product has... built-in snap lock tabs. Each file has 5 clear tabs, which can be folded up and 'snapped' into place, acting as a tab label for the folder. No more squeaky plastic tabs to slide in and out, these guys have a built-in tab perfect for labelling. I think they will also be invaluable, as I know sometimes the plastic slide-in tabs can pop off and ruin your entire filing system. And if you change your filing system, it is so easy just to fold down the tab and snap up another one in a different position, as needed.
Firstly, the files come in lots of colours, most importantly red, which was just what I needed for my project. It is just a bonus that the inside colour of the file is pink ;) Apparently this is to prevent mis-files, which occurs when you slip something in between 2 files, and it falls down below. So having something to prevent this happening is not only functional, but I think it looks pretty too!
It wasn't until I got home that I realised the amazing feature that this product has... built-in snap lock tabs. Each file has 5 clear tabs, which can be folded up and 'snapped' into place, acting as a tab label for the folder. No more squeaky plastic tabs to slide in and out, these guys have a built-in tab perfect for labelling. I think they will also be invaluable, as I know sometimes the plastic slide-in tabs can pop off and ruin your entire filing system. And if you change your filing system, it is so easy just to fold down the tab and snap up another one in a different position, as needed.
Labels:
Cassadiva's Choice,
Organising,
Recipes,
Stationery,
Tips
Monday, 4 July 2011
Highlighter Pen with Built-In Post Its
Today I have yet another great pen that I have found!
It is a slimline highlighter pen that has a mini post-it note dispenser on it.
Labels:
Organising,
Stationery
Monday, 27 June 2011
Cook Islands Travel Journal
I remember when I was a little girl and we were on a family holiday at Bribie Island, I kept a scrapbook-journal of our trip. I remember collecting leaves when we went on walks and sticking them in, along with writing about our adventures of the day. We had lots of wonderful holidays growing up, but I always remember this holiday more vividly, I think it is because I had the journal to look back on for years to come. So, when we went to the Cook Islands recently, I decided to try to keep a Travel Journal.
Labels:
Stationery,
Travel
Saturday, 25 June 2011
Outline Marker Pens
Ooooh! Check out these amazing Outline Pens! They are so pretty! Can you believe that this gorgeous writing is from ONE pen? It is not a silver pen, then outlined in pink - it is just one very, very clever pen!
Labels:
Stationery
Saturday, 18 June 2011
Erasable Pens
Today I want to share with you these amazing pens that I was recently introduced to. They rub out!!! Yes, that is correct - a marking pen that you can erase if you make a mistake :) I just love stationery - and when I find a gem like this, I feel it is my duty to share!
I have always been a big 'pencil' person, as I hate to see crossing out in my diary, on lists, etc. So, I always wrote in pencil so that I could erase any mistakes that I made. Now, I have these pretty coloured marking pens by Pilot called Frixion, and I can rest assured that if I make a mistake I can simply rub out my error - how exciting!
| Before |
| After |
Labels:
Organising,
Stationery
Subscribe to:
Posts (Atom)