So, the first thing that I did was a YouTube search on 'How to Make Tissue Paper Flowers' and found this simple tutorial - which you can watch here. I realised that it was quite an easy process, it just takes a little time.
I bought purple tissue paper (Mum's favourite colour) and purple ribbon too. And then I gave it a whirl...
Step 1
Cut 8 rectangles of tissue paper (just using the folds as the size guide).
I cut 4 light purple and 4 dark purple.
I alternated the colours, ensuring that the light purple (which I wanted in the centre of each flower) was on the bottom.
Step 2
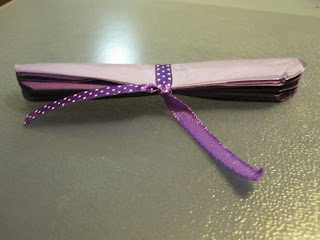
Concertina fold the stack of paper, along the short side of the rectangle.
Tie a ribbon in the centre of the folded paper, to hold it in place.
Step 4
Round the edges to ensure that the petals are a nice shape.
Step 5
Hold the paper using one hand, fan the ends out to create a flower shape.
Step 6
Pull up one layer of tissue paper at a time, into the middle of the flower (carefully, as it rips easily!).
Repeat this process until all layers have been separated (this is the time-consuming part).
And now we have a beautiful flower!!
I used one to decorate Mum's presents (and also to decorate my friend Mel's present a few days earlier too!)...
I used them as decorations for each place setting at the dinner table...
I made a big one for the centre of the table...
It looked so pretty!
I also had a play with them, displaying them on my gorgeous new cake stand...
So, now I think I have to make some red ones for my house :)
But if you aren't into crafts and don't have the time/patience to tackle this cheap & easy craft, you can buy absolutely stunning Pom Poms and Flowers from my lovely friend Daneve online at Ah-Tissue. Check out her website here... Her poms and flowers are just amazing!!! I was happy with how mine turned out, but Daneve's are just that professional quality, which is great for those extra-special events.
Happy Birthday Mum! I hope you had a very special birthday - I loved spending the day with you. xxx
You can see more of my paper flowers on these other posts:


6 comments:
You are so clever to be able to make these yourself!
I bought some from Daneve for Lucy's Naming Day. I didn't quite master the art of pulling them out- they still look a little wonky!
The table looks beautiful!
Thanks Nat! Mine are wonky too - I think it adds to the effect ;) So glad you used Daneve - she is fantastic!
love it all,so nice and i want to learn how to make it.maybe it is simple but makes your table beautiful and elegant
WoW WOW
I absolutely love these! So simple & elegant !
Just found this post and I love pictorials so much better than videos. Thanks! I will be sure to share mine soon, so maybe you can stop by and see.
Georgiana
Carson's Creations
I just found your tutorial. I am going to make some of these soon.I am doing fabric flowers at the moment, but soon..on to paper and tissue, and crepe!
Love what you did with the flowers too.
Thanks
Judy
Post a Comment